In this guide you will learn how to setup Amazon SES and connect it to Semplates. This is an important requirement in order to publish and use templates in SES after designing them in Semplates.
Note: Semplates also supports connection via role-based access control (RBAC). Using access and secret key is a legacy option. It's recommended to use RBAC since its the more secure way of enabling cross-account access.
Enabling production mode
In case you are already using AWS SES and want to connect it with Semplates right away, you can skip the first step and move to the next section. If you do not have an AWS account yet, go and sign up for one here.
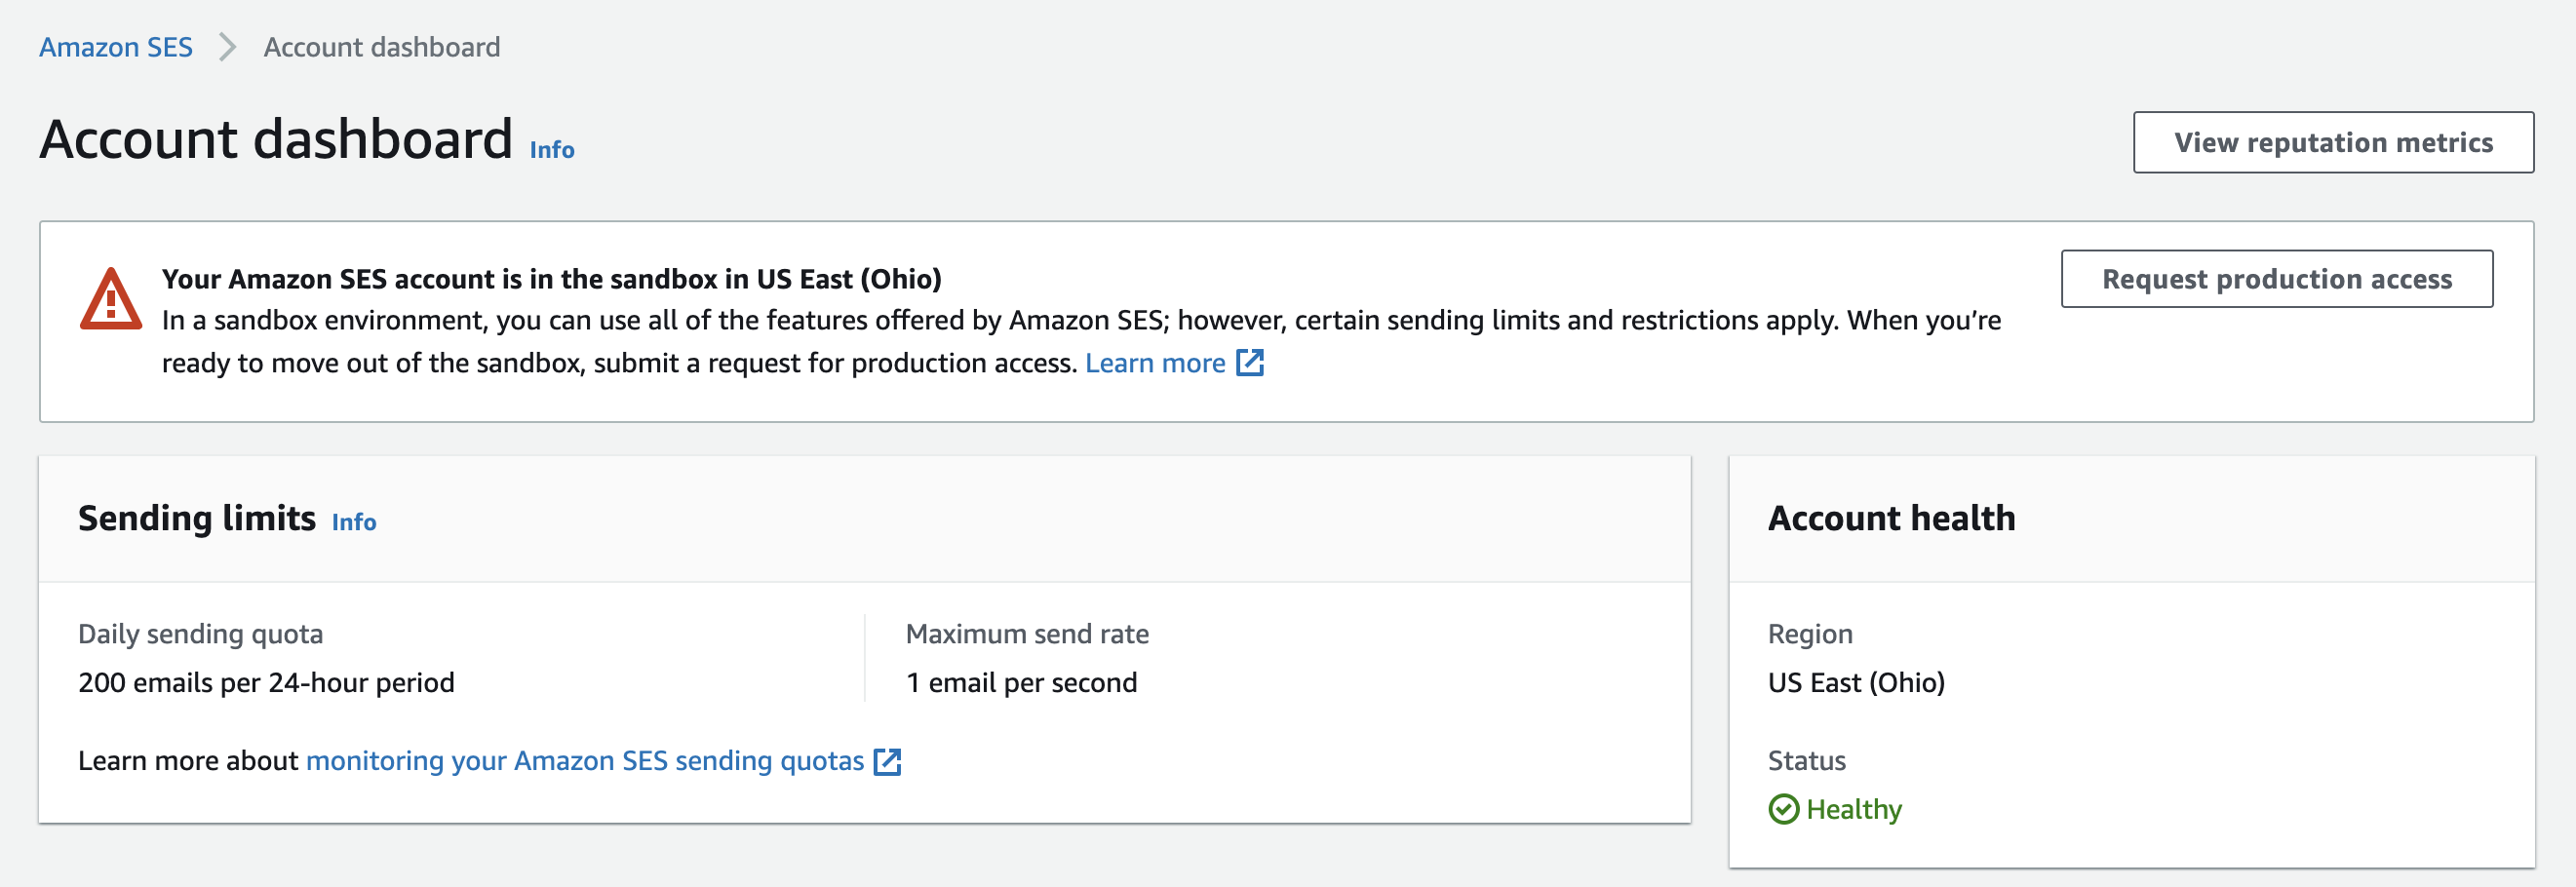
If you have not used SES before, you first have to get out of sandbox mode. To achieve this, log into the AWS console and go to the SES dashboard. First you will be asked to create an identity. For this, you need to verify a domain or email address that you wish to use for sending emails. Afterwards you will find a note, that you are still in sandbox mode (as in the below image) and that you have to request production mode access. Follow the description as stated there to achieve this step:
Creating AWS credentials
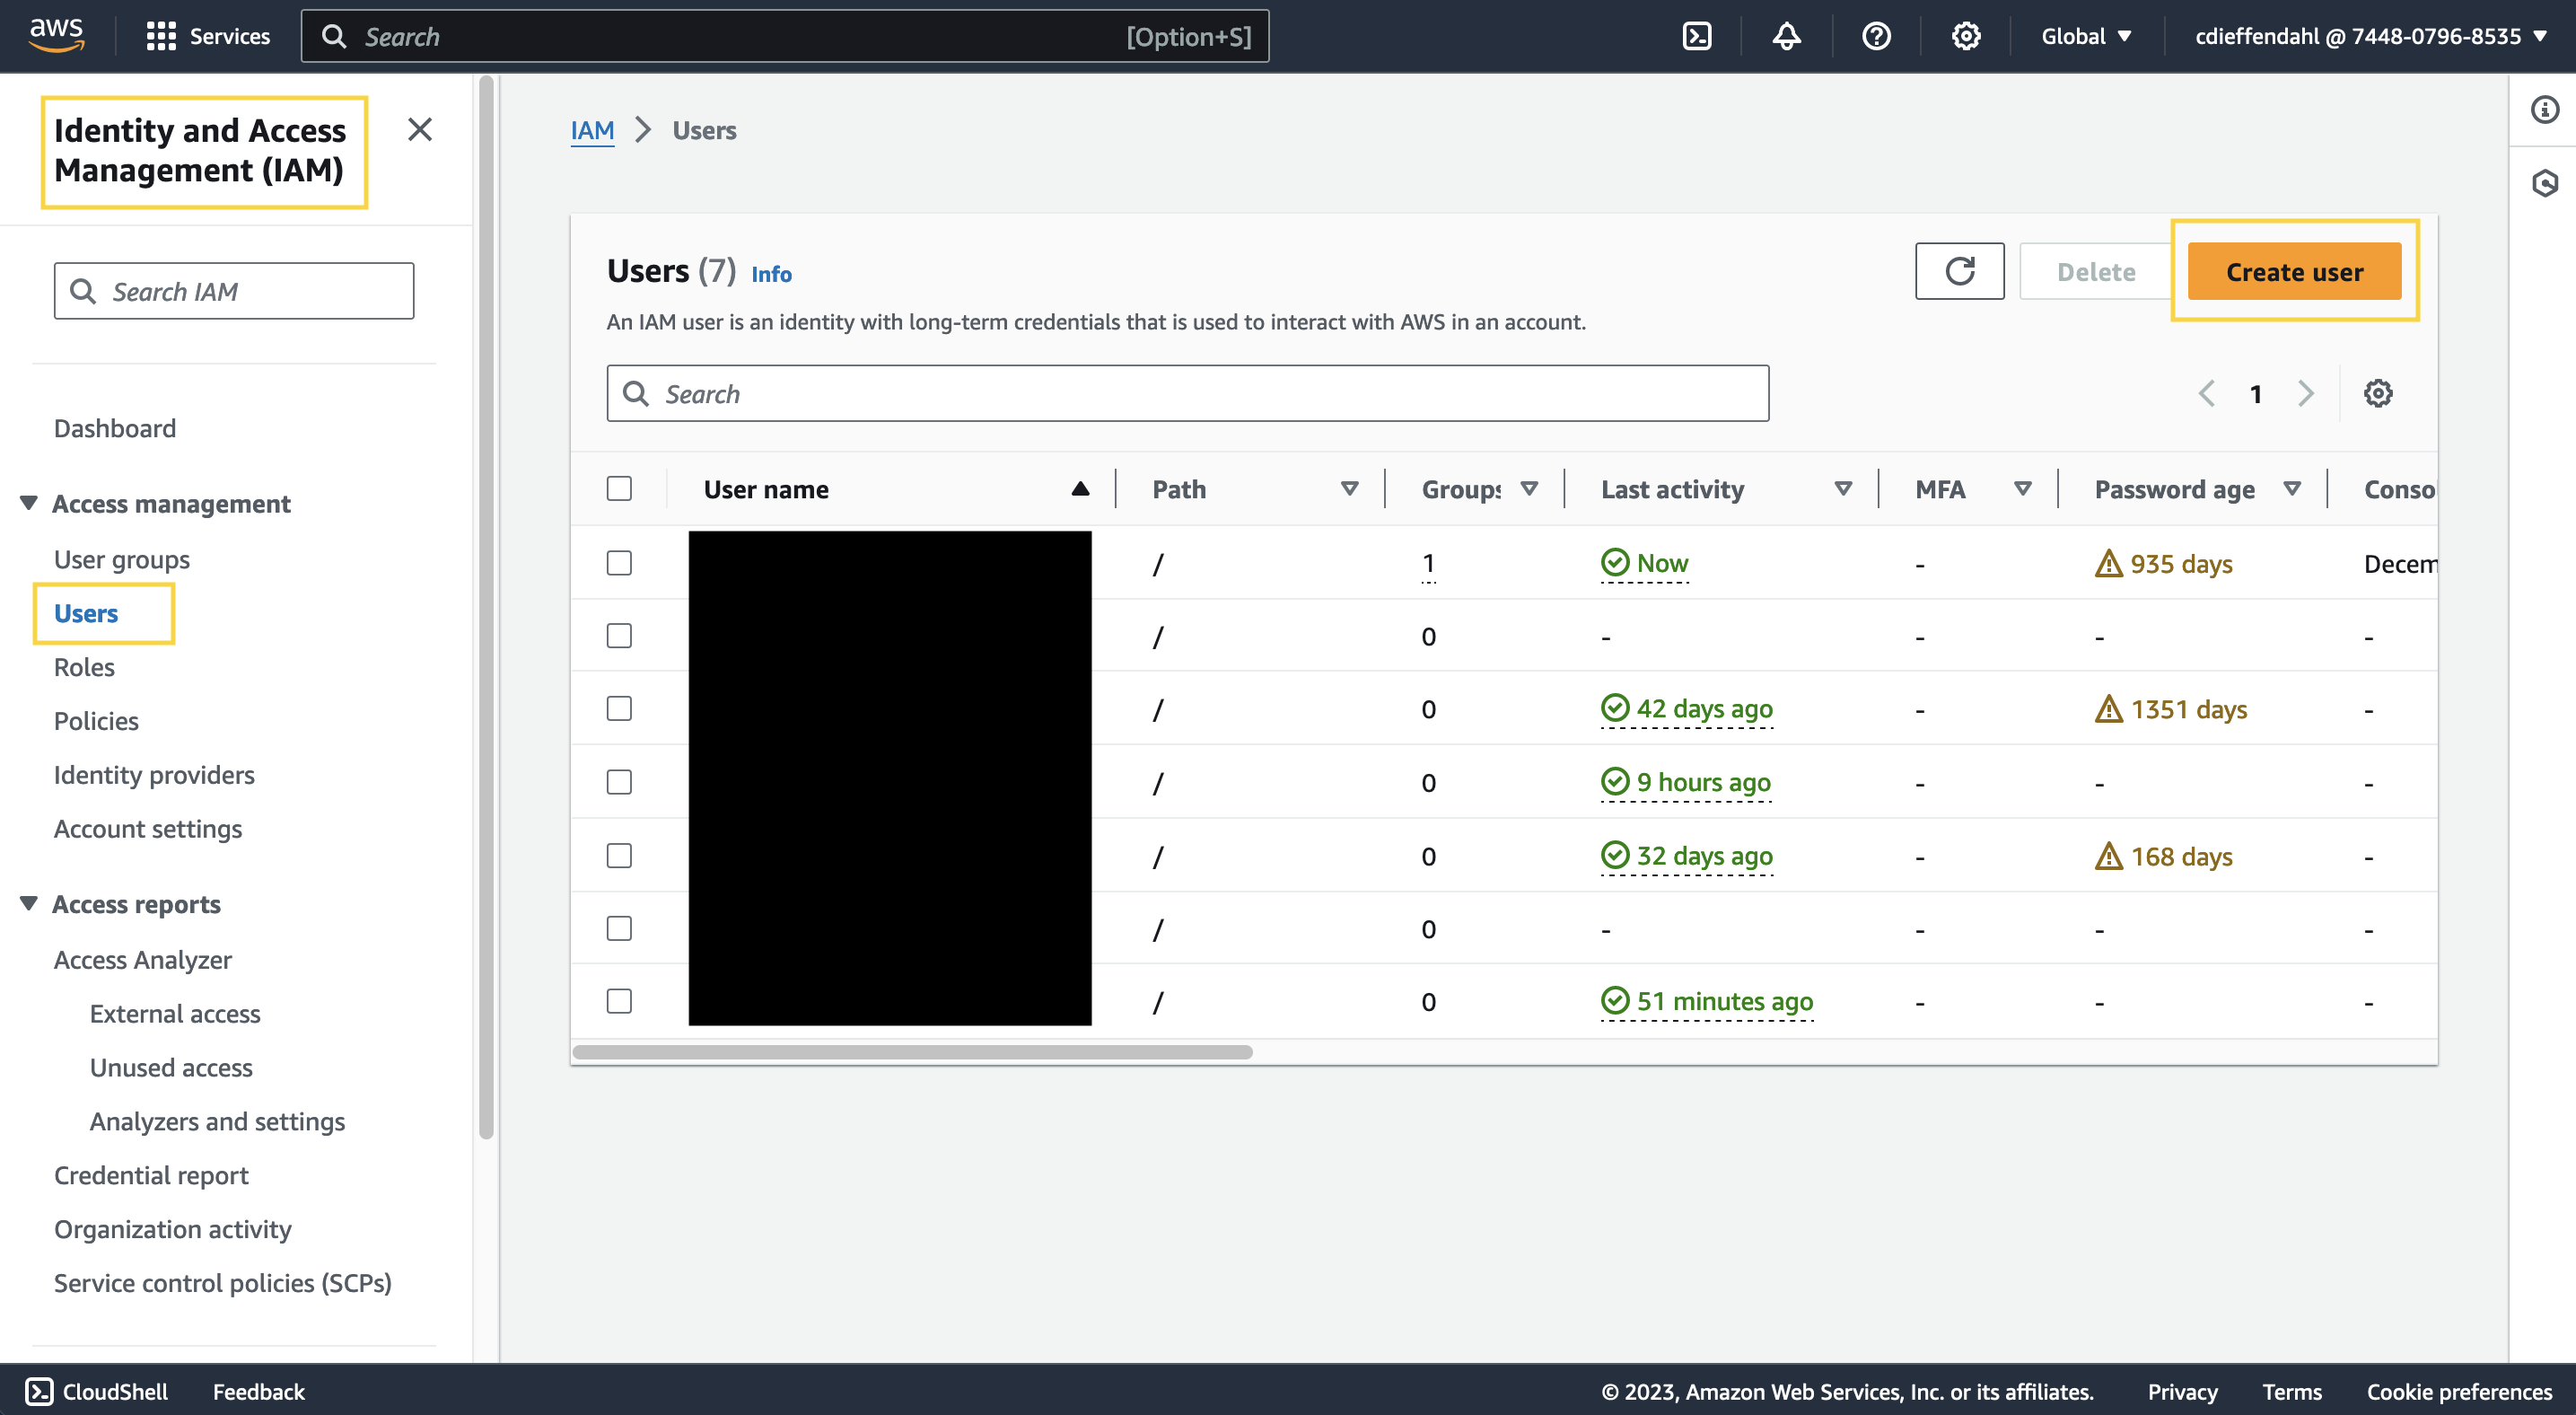
Next you need to grant Semplates access to AWS SES by creating a new account that grants Semplates permissions. To do so navigate to AWS IAM (Identity and Access Management) in the AWS Console and open the Users panel. Click Add users in the upper right corner:
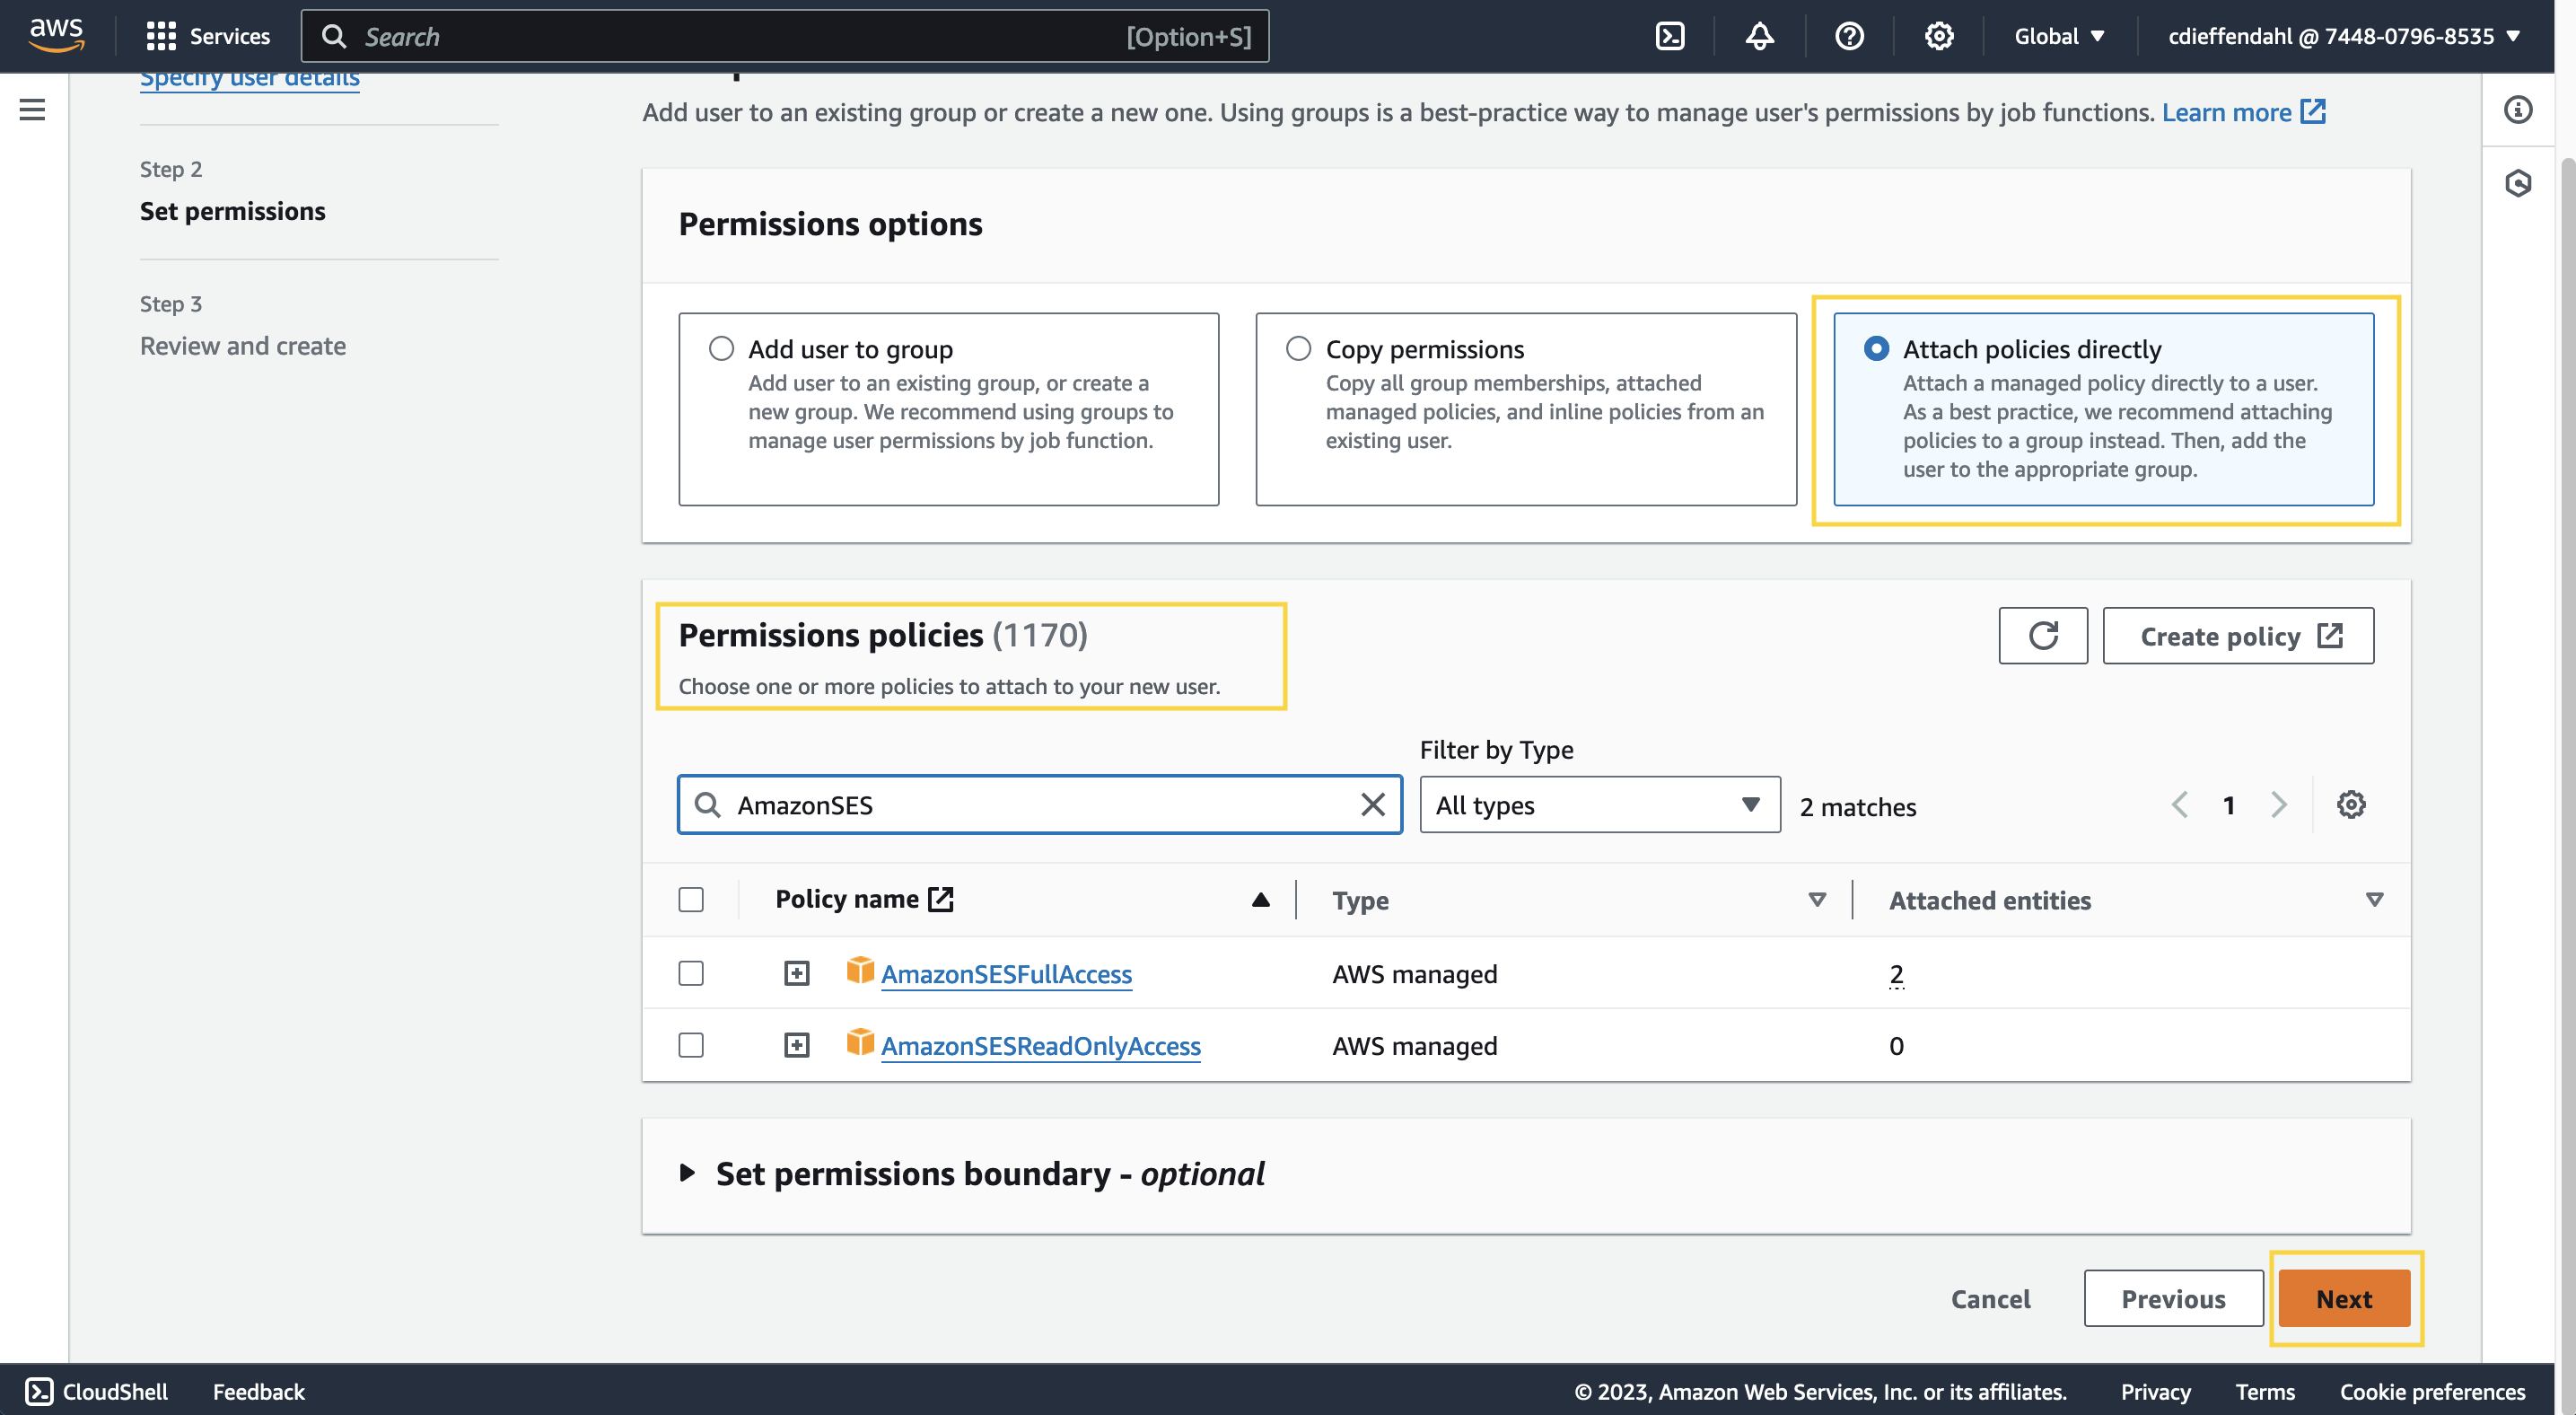
Choose a descriptive user name, then click next and select the existing policy AmazonSESFullAccess. This gives us permission to add new templates, verify emails, etc.:
Alternatively, you can also create a custom policy in order to give Semplates as little permissions as possible but as much as needed:
{
  "Version": "2012-10-17",
  "Statement": [
    {
      "Sid": "GetCallerIdentity",
      "Effect": "Allow",
      "Action": [
        "sts:GetCallerIdentity"
      ],
      "Resource": "*"
    },
    {
      "Sid": "SimulatePrincipalPolicy",
      "Effect": "Allow",
      "Action": [
        "iam:SimulatePrincipalPolicy"
      ],
      "Resource": "arn:aws:iam::123456789012:policy/YourPolicyName"
    },
    {
      "Sid": "TemplateManagement",
      "Effect": "Allow",
      "Action": [
        "ses:CreateTemplate",
        "ses:DeleteTemplate",
        "ses:GetTemplate",
        "ses:UpdateTemplate",
        "ses:ListTemplates"
      ],
      "Resource": "*"
    },
    {
      "Sid": "DomainManagement",
      "Effect": "Allow",
      "Action": [
        "ses:GetIdentityDkimAttributes",
        "ses:GetIdentityMailFromDomainAttributes",
        "ses:PutEmailIdentityDkimSigningAttributes",
        "ses:SetIdentityMailFromDomain",
        "ses:VerifyDomainIdentity",
        "ses:VerifyDomainDkim"
      ],
      "Resource": "*"
    },
    {
      "Sid": "SenderAddressManagement",
      "Effect": "Allow",
      "Action": [
        "ses:DeleteIdentity",
        "ses:GetEmailIdentity",
        "ses:GetIdentityVerificationAttributes",
        "ses:VerifyEmailAddress",
        "ses:VerifyEmailIdentity",
        "ses:ListIdentities",
        "ses:ListVerifiedEmailAddresses",
        "ses:DeleteVerifiedEmailAddress"
      ],
      "Resource": "*"
    },
    {
      "Sid": "SendingStatistics",
      "Effect": "Allow",
      "Action": [
        "ses:GetAccountSendingEnabled",
        "ses:GetSendStatistics",
        "ses:GetSendQuota"
      ],
      "Resource": "*"
    },
    {
      "Sid": "MailSending",
      "Effect": "Allow",
      "Action": [
        "ses:SendEmail",
        "ses:SendTemplatedEmail",
        "ses:TestRenderTemplate"
      ],
      "Resource": "*"
    }
  ]
}
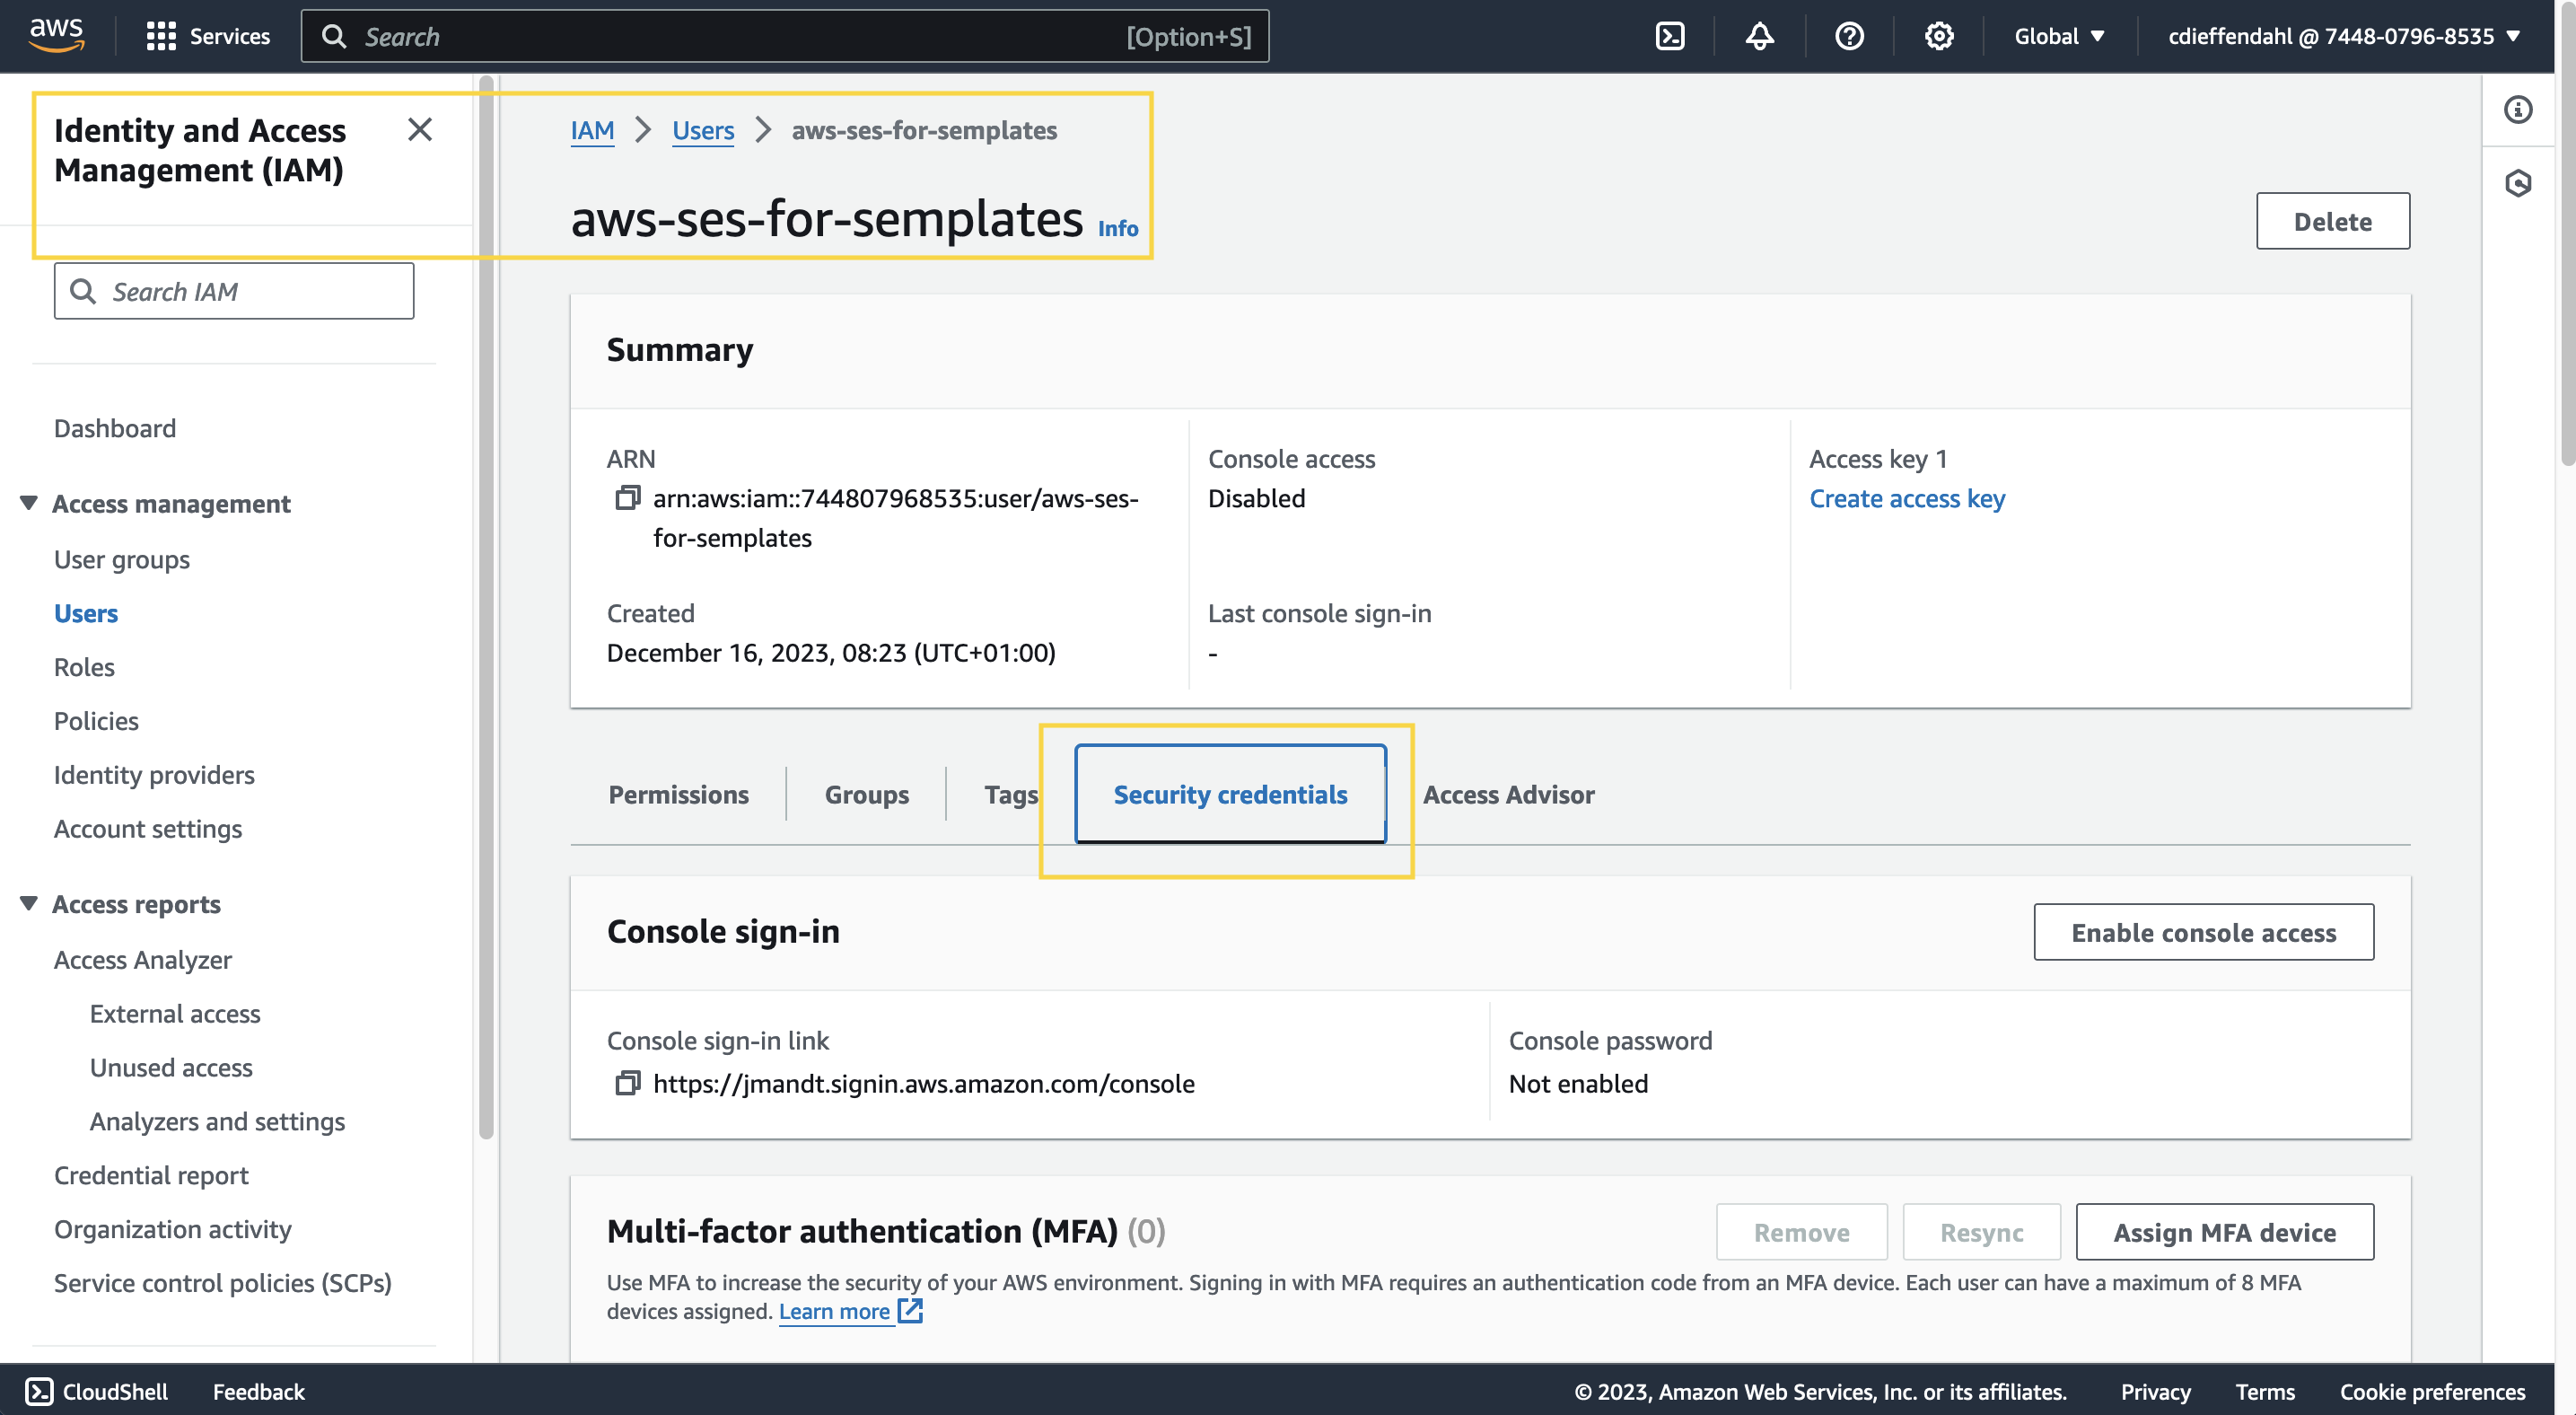
Continue the setup by creating the user. Once your user is created, you will need to create a Key Pair that Semplates will use to authenticate with AWS. To do so, open up user settings of the user you just created and navigate to the Security credentails tab:
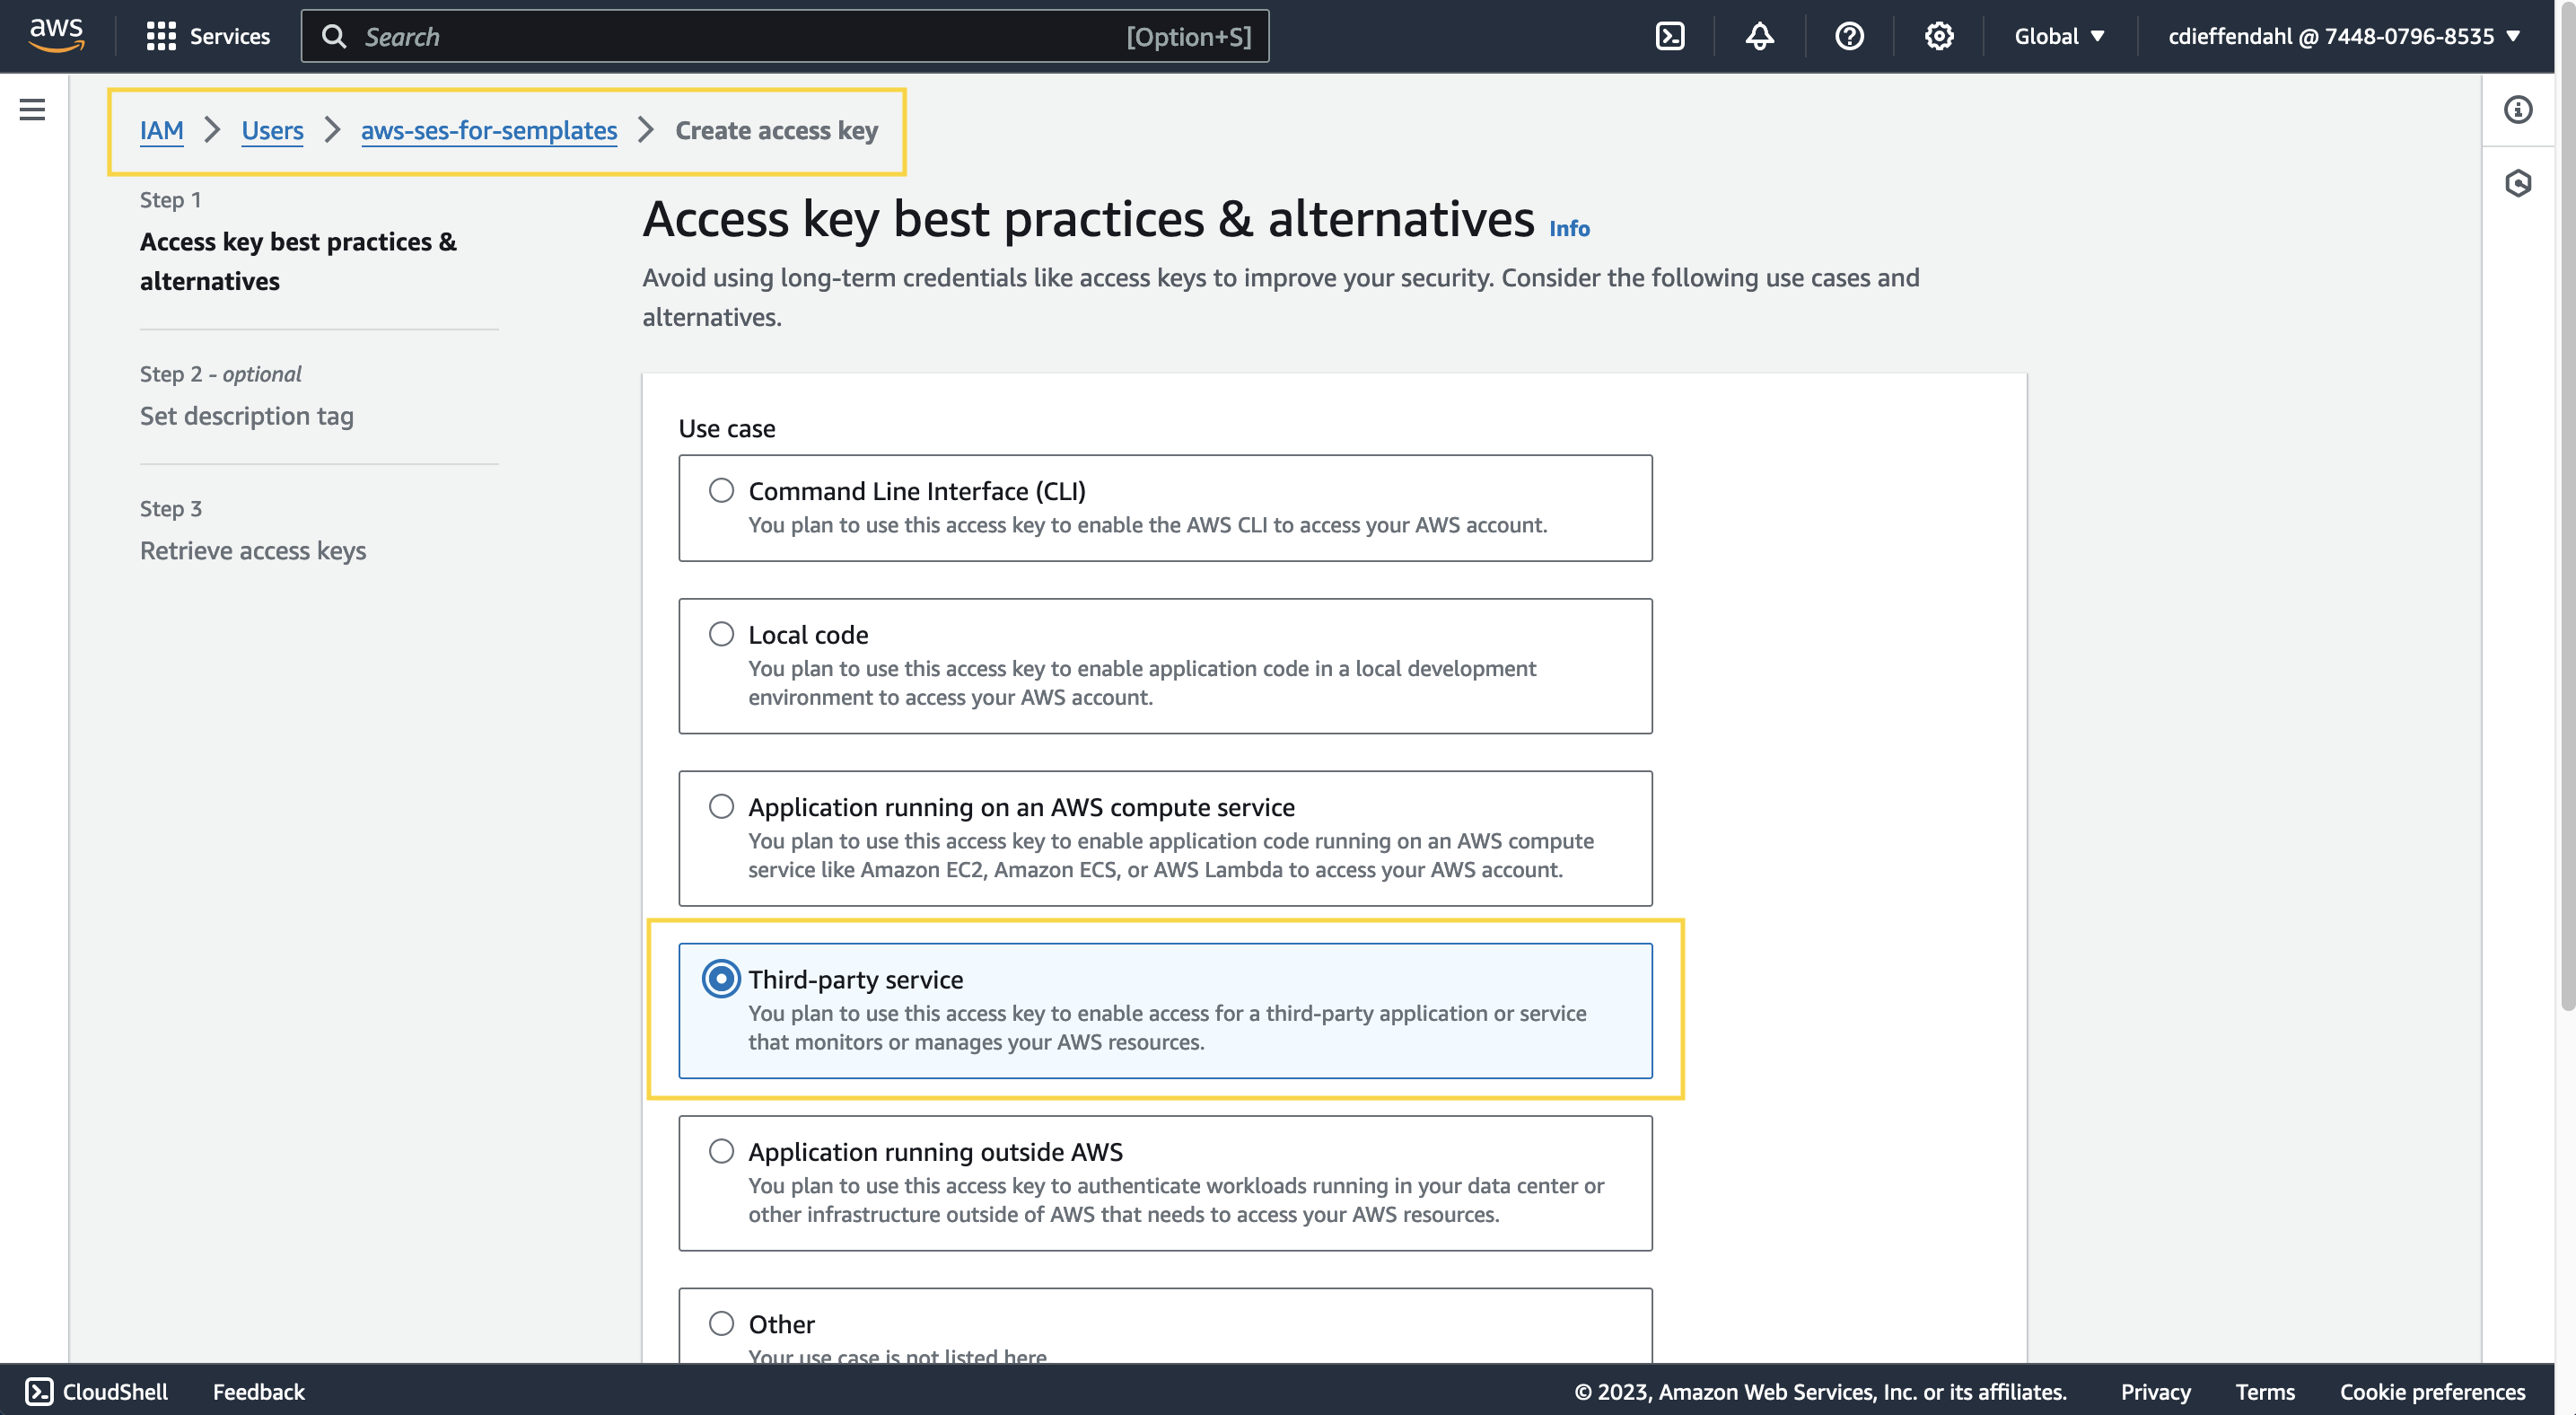
Scroll down a bit to the Access keys section and click on the create access key button. Within the dialog, select third-party services and confirm the information:
A pair of access key and secret access key will be created:
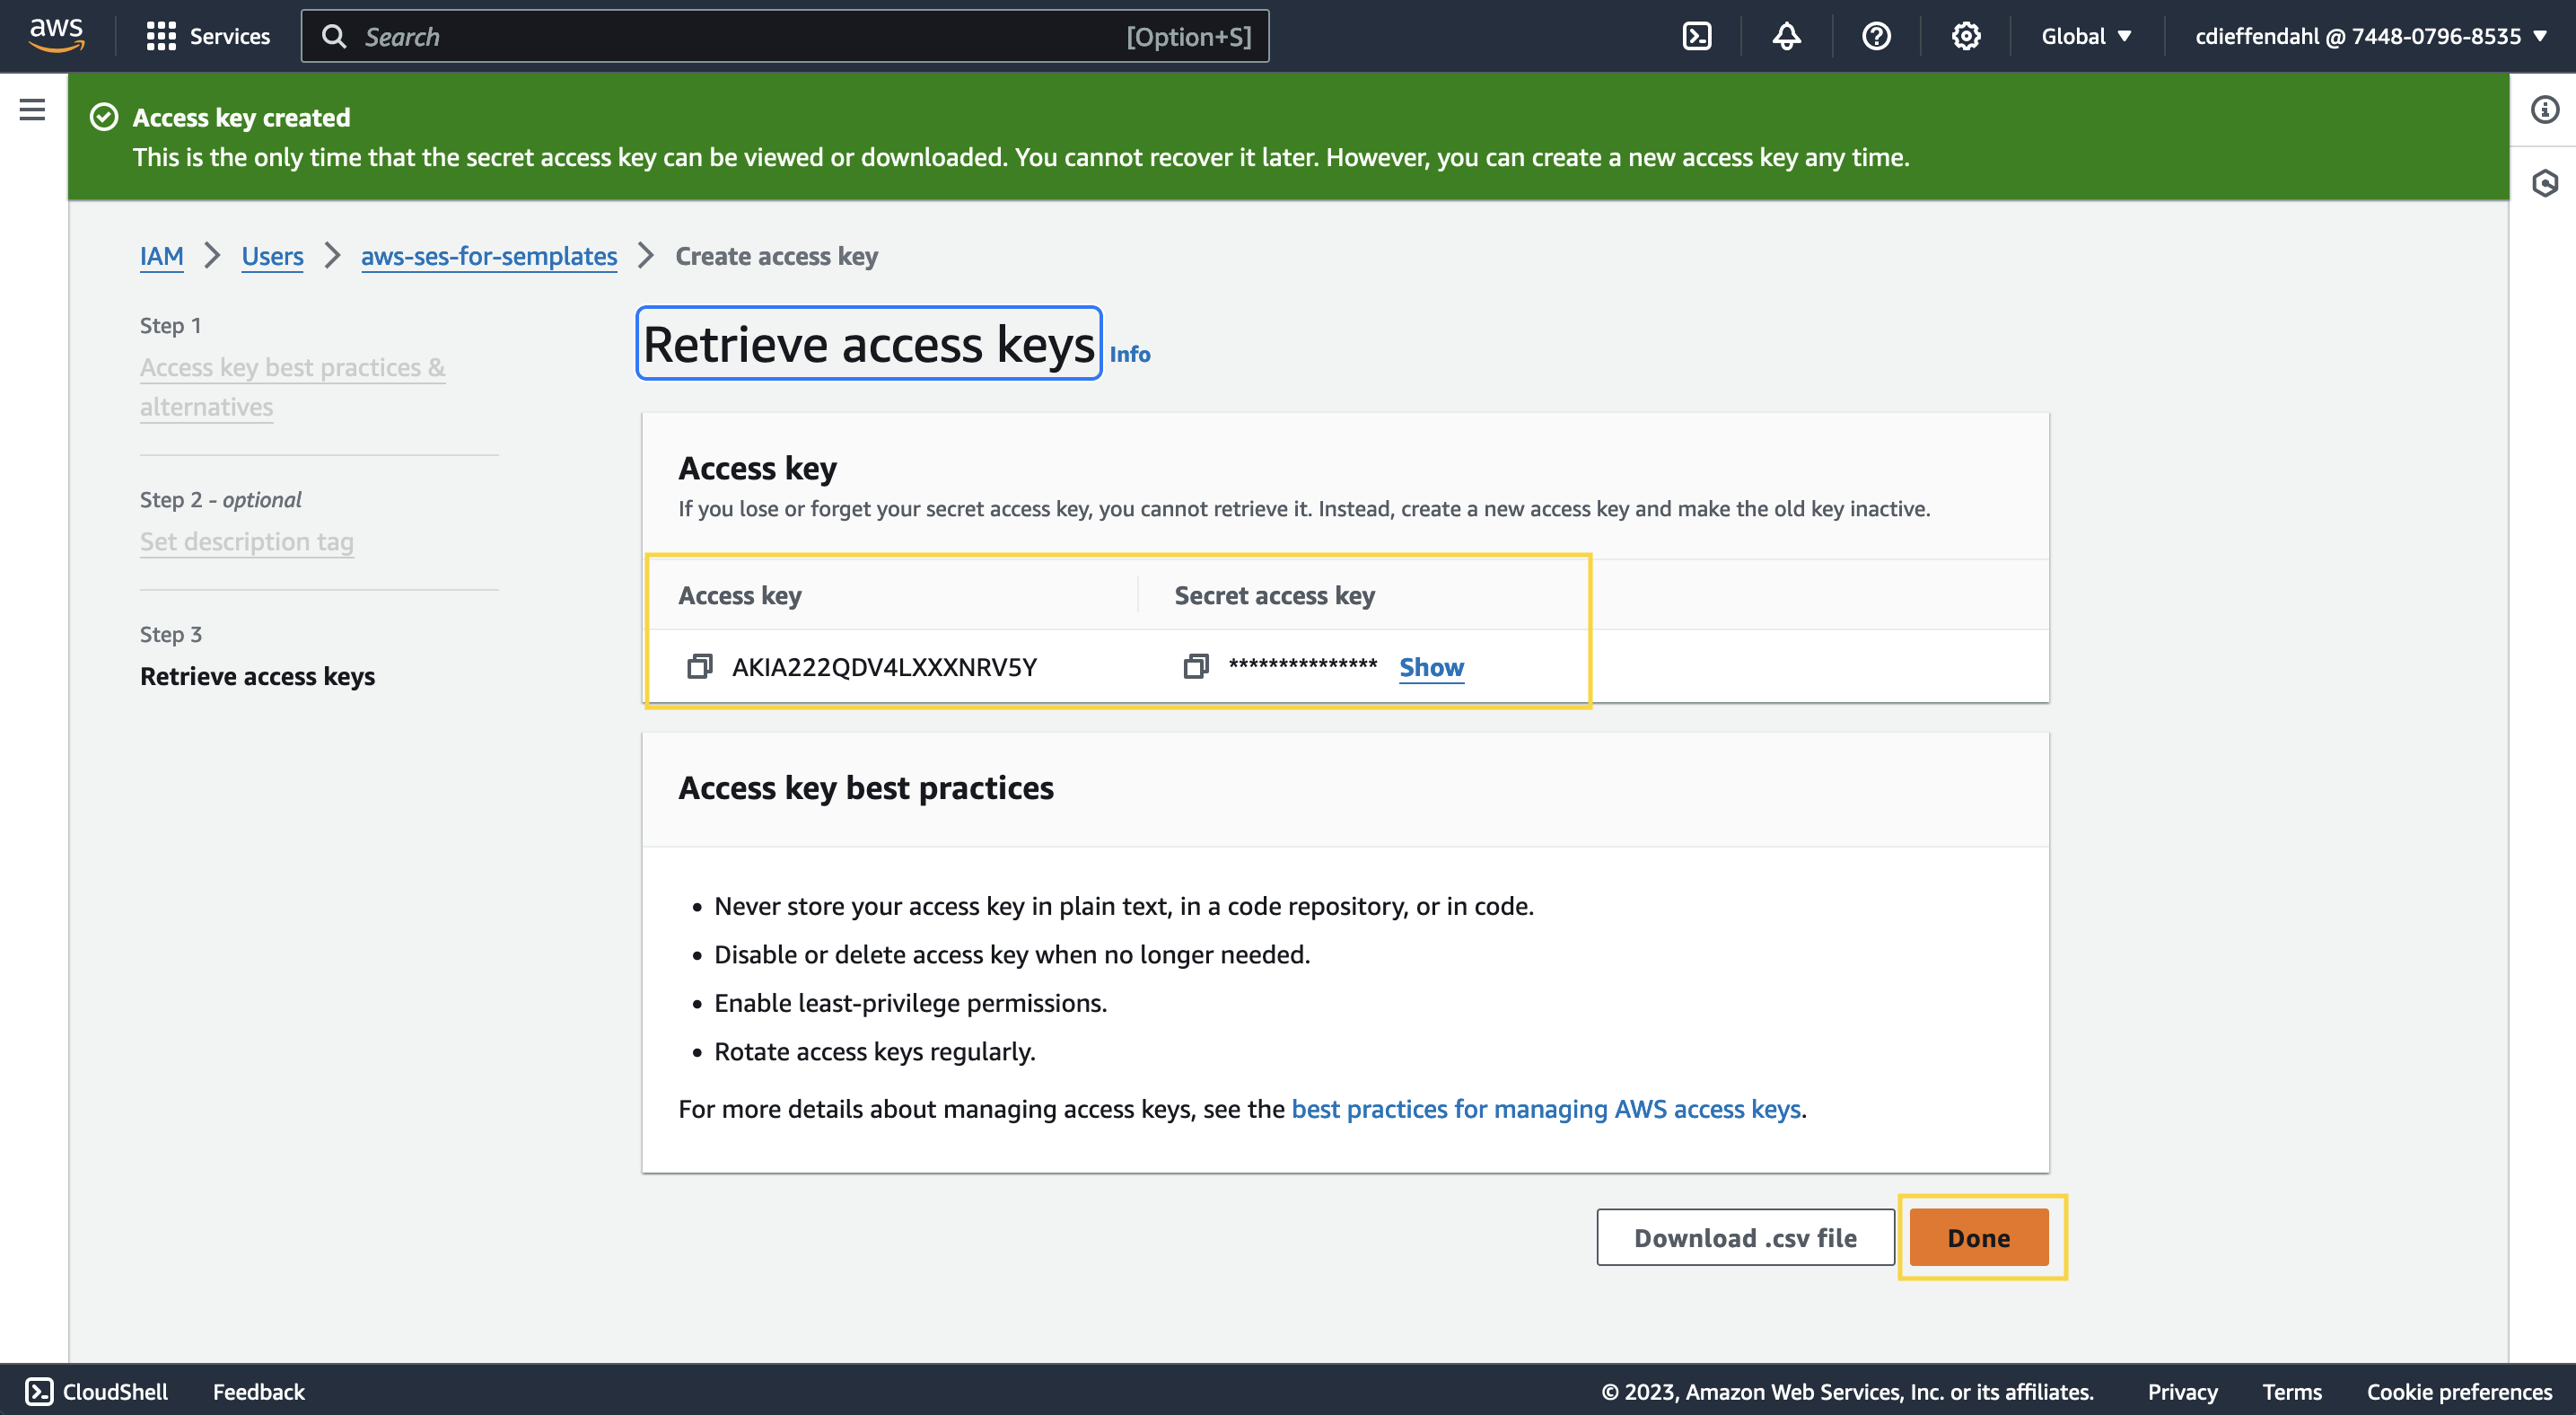
Make sure to copy those values, as the secret access key is only visible on creation and you will need to provide this information to Semplates in the next step.
Connecting with Semplates
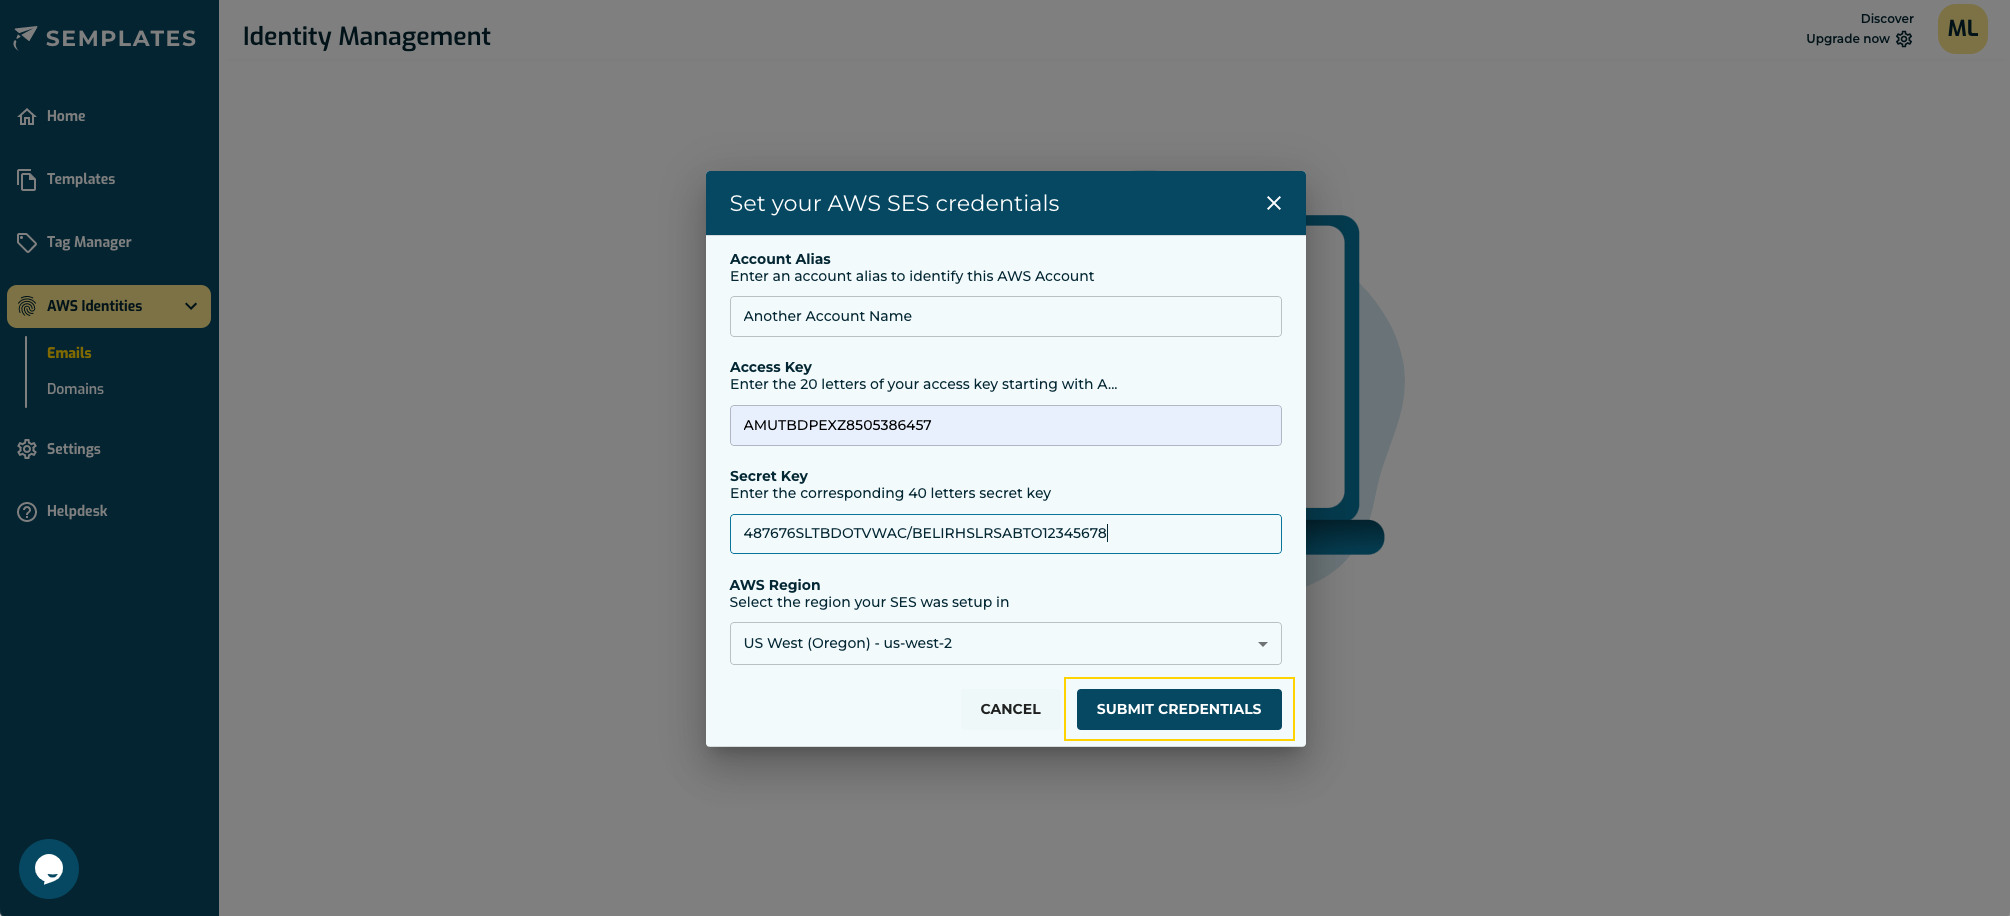
You can either enter your information within the onboarding dialog or go to Settings > AWS Credentials and enter your credentials there. Make sure to use the correct region (the one AWS SES is located in). We will then validate your credentials.
Note: You cannot access the secret key again, however, you can delete the access pair and create a new one.
A word on connecting multiple AWS SES accounts
One of the most exciting features of Semplates is the possibility to add multiple accounts and then duplicate templates between them. It allows you to smoothly support a couple of advanced usage patterns including:
- Managed AWS SES: If you manage AWS SES for a client (e.g. as an agency), you can design and test your templates in your own AWS SES account before duplicating them to your client.
- CI/CD Template Design: If you have multiple AWS accounts due to your development setup (e.g. develop, staging, production), then you can use Semplates to move your templates along, following the same process logic.
- Multi Region Architectures: Your architecture is spanning across multiple regions? If SES needs to be available redundantly for you, so do your templates!
Continue the setup
You have now successfully connected AWS SES with Semplates. Continue the setup by: